*Be sure to check my recent update on this post here: How I Hang My Hats
My father wears a lot of hats. Most of the time when he goes outside, he’s either wearing one of his fedoras or a classic Panama on hot days, a velvet fedora for trips to the New York City Ballet, or a tan one that matches his trench coat for teaching at the University. I’m not sure how I went hatless for so long, but I’ve only recently started buying hats for myself. Within two years of buying my first Panama from a street stall in Arles, I now have a few too many and nowhere to store them. For the past few months I’ve stacked one upon the other, balancing them haphazardly on top of sweaters in my closet. But I didn’t recognize that there was a problem until I went to retrieve a sweater, and all the hats fell into a heap on the floor. I needed a storage solution!
While hunting Pinterest for wedding inspiration (I’m getting married in July), I stumbled upon an effortlessly chic hat display. How could I get this into my life! I thought. The hats hung flush on the wall like pieces of art and I thought it was both a clever and pretty way to store them.
Here are some of my favorite hat displays from Pinterest:

no 1. I really love these hats hanging on a string. It’s a great way to store a large collection in a small space, and looks like textured wall art. While this looks fantastic from a design point of view, I fear the clothespins will leave marks on the brims, and that simply won’t work for me. via
no 2. This next look is very “California chic”, but because my hats are similar in shape and size, I’d prefer to stagger them on the wall. I doubt they’d look as interesting lined up in a very orderly row, so I’ll keep this in mind as a visual goal, but I’m going to find something more suited to my collection. via
no 3. The last photo is a cool way to hang hats: hiding the hooks so it looks like the hat is floating. This is my favorite, but my goal is to combine the organic-staggered look from the first two photos, with this floating-on-the wall style I really like. via
In an ideal world, I would use the copper hooks salvaged from our old closets, but our apartment has plaster walls and I don’t want to drill too many holes. Without copper hooks, and not wanting a traditional hat rack, I need to get creative! After a bunch of research and browsing options online, I decided that the best way to attach anything to a difficult wall is by using Command Hooks
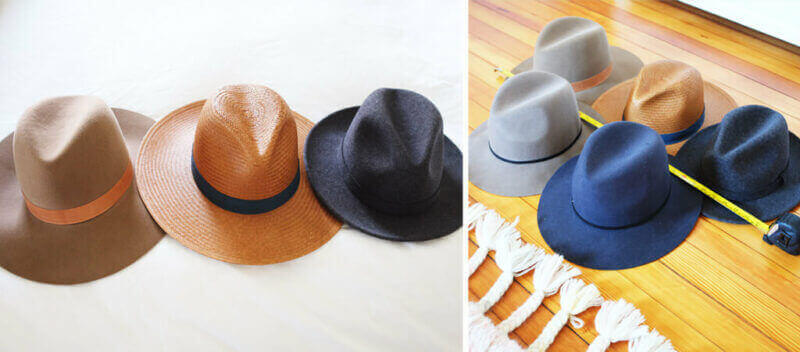
Start by laying out the hats in a design, playing around with the colors and sizes until you are happy with how it looks.
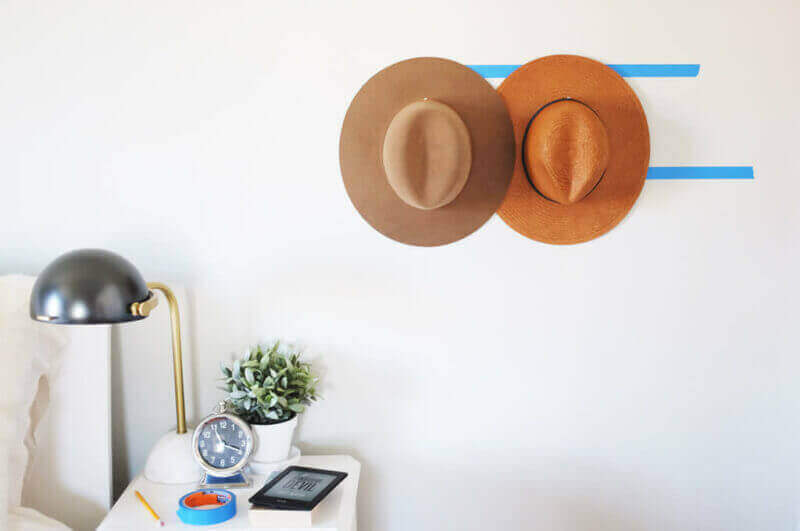
Next, estimate the length of the whole display. Measure a piece of tape the same length and place it on the wall to use as a guide for the hooks.

Hold up a hat or two to visually estimate where the hats look best. Consider the height placement, so it’s not too close to the ceiling or other objects. Does a brim come too close to a corner? Make sure the layout is not cramped, and that there is enough room for all your items.
Using the tape as a general guide, attach the first hook above its center. The tape is there to give you an idea of the width, but the layout doesn’t have to be perfect as long as it looks balanced and feels right to you. Take your time deciding where to place each hook, checking that the brims overlap nicely.
Be sure to follow the instructions on the back of the Command hook packaging and hold the hook long enough to stick on the wall – otherwise they may fall off.
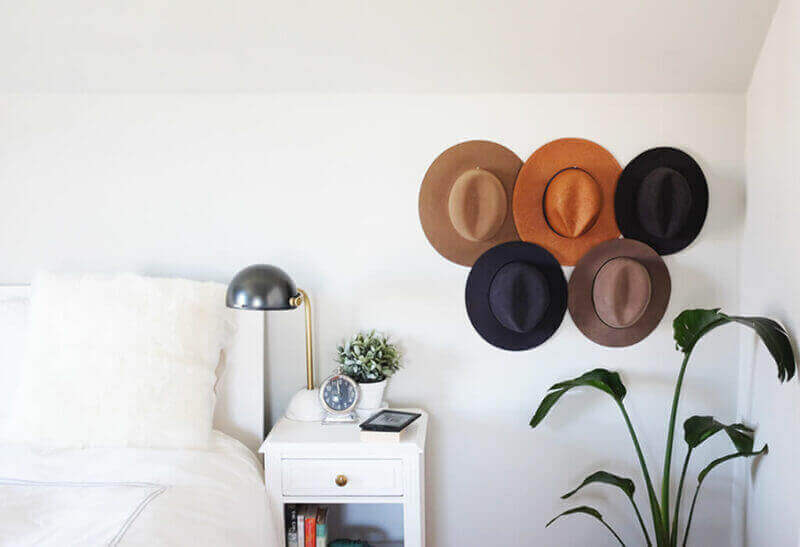
After the first hat is placed the way you like it, figure out where you want to hang the next hook. Mark and place it. Continue on until you have all your hooks attached and your wall display resembles the original layout you had on the floor. I thought I would want a more organic look than I actually ended up with. Turns out, I wanted the hats to be in a row and level, rather than up in the wall in a random way. Don’t be afraid to make adjustments as you see fit.
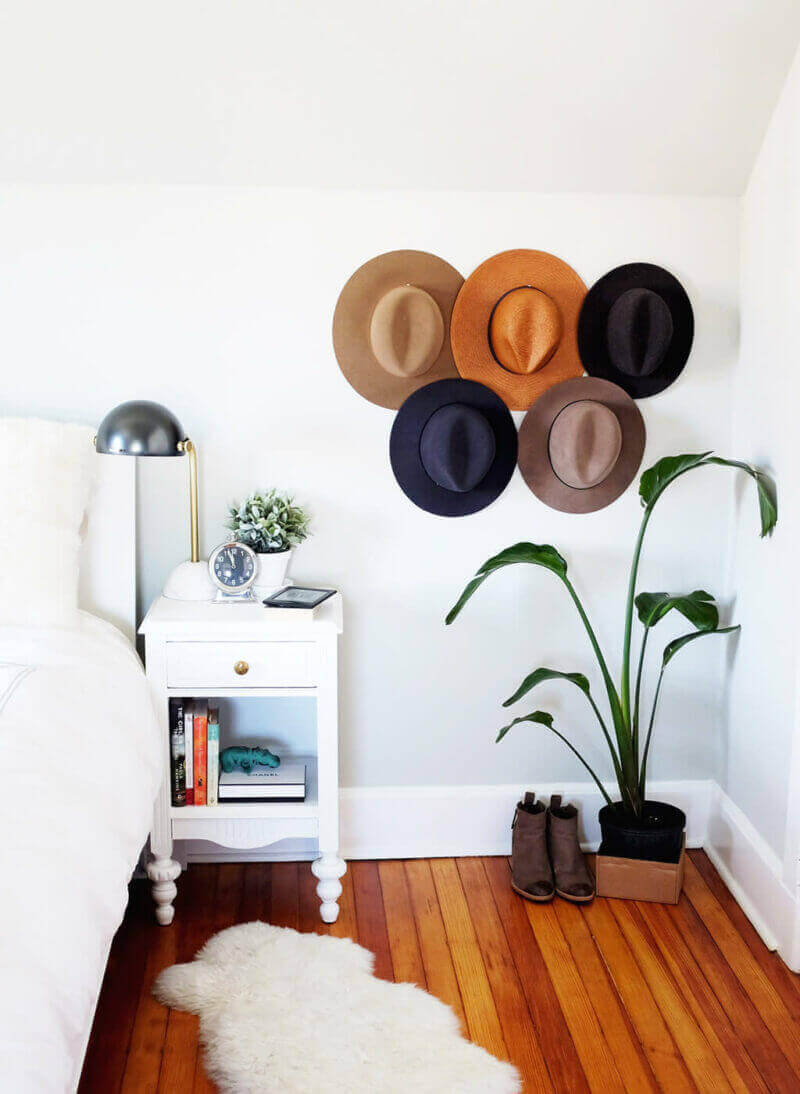
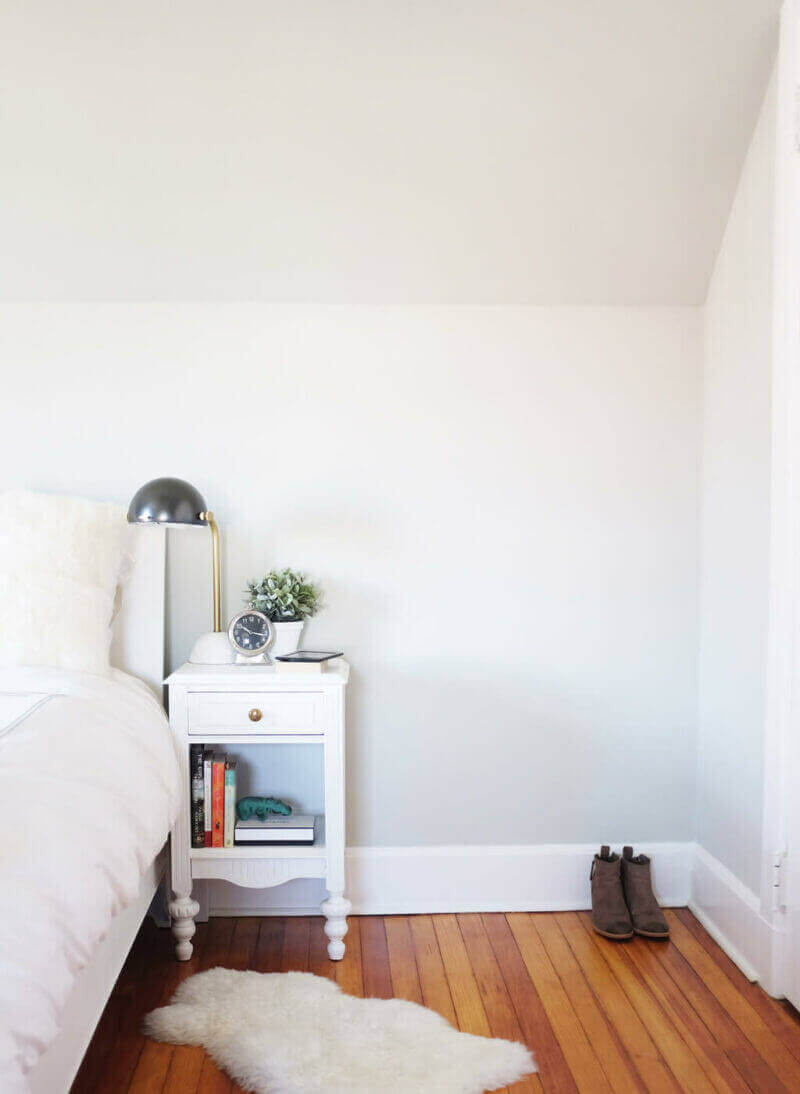
I’m so happy with this design. Now, not only can I see what hats I have at a glance before leaving the house, but I can also appreciate the shapes and materials. Now to get my dad to hang his fedoras and Panamas this way, instead of stacking them in the closet like I used to!